# Flutter Callkit Incoming
## Setup Pushkit for IOS.
If you are making VoIP application than you definitely want to update your application in the background state as well as wake your application when any VoIP call is being received.
## 🚀 Setup
Make sure when you create Bundle ID(https://developer.apple.com/account/resources/identifiers) for app you have checked `Push Notifications`
1. Enable Voice over IP Setting
* Xcode Project > Capabilities
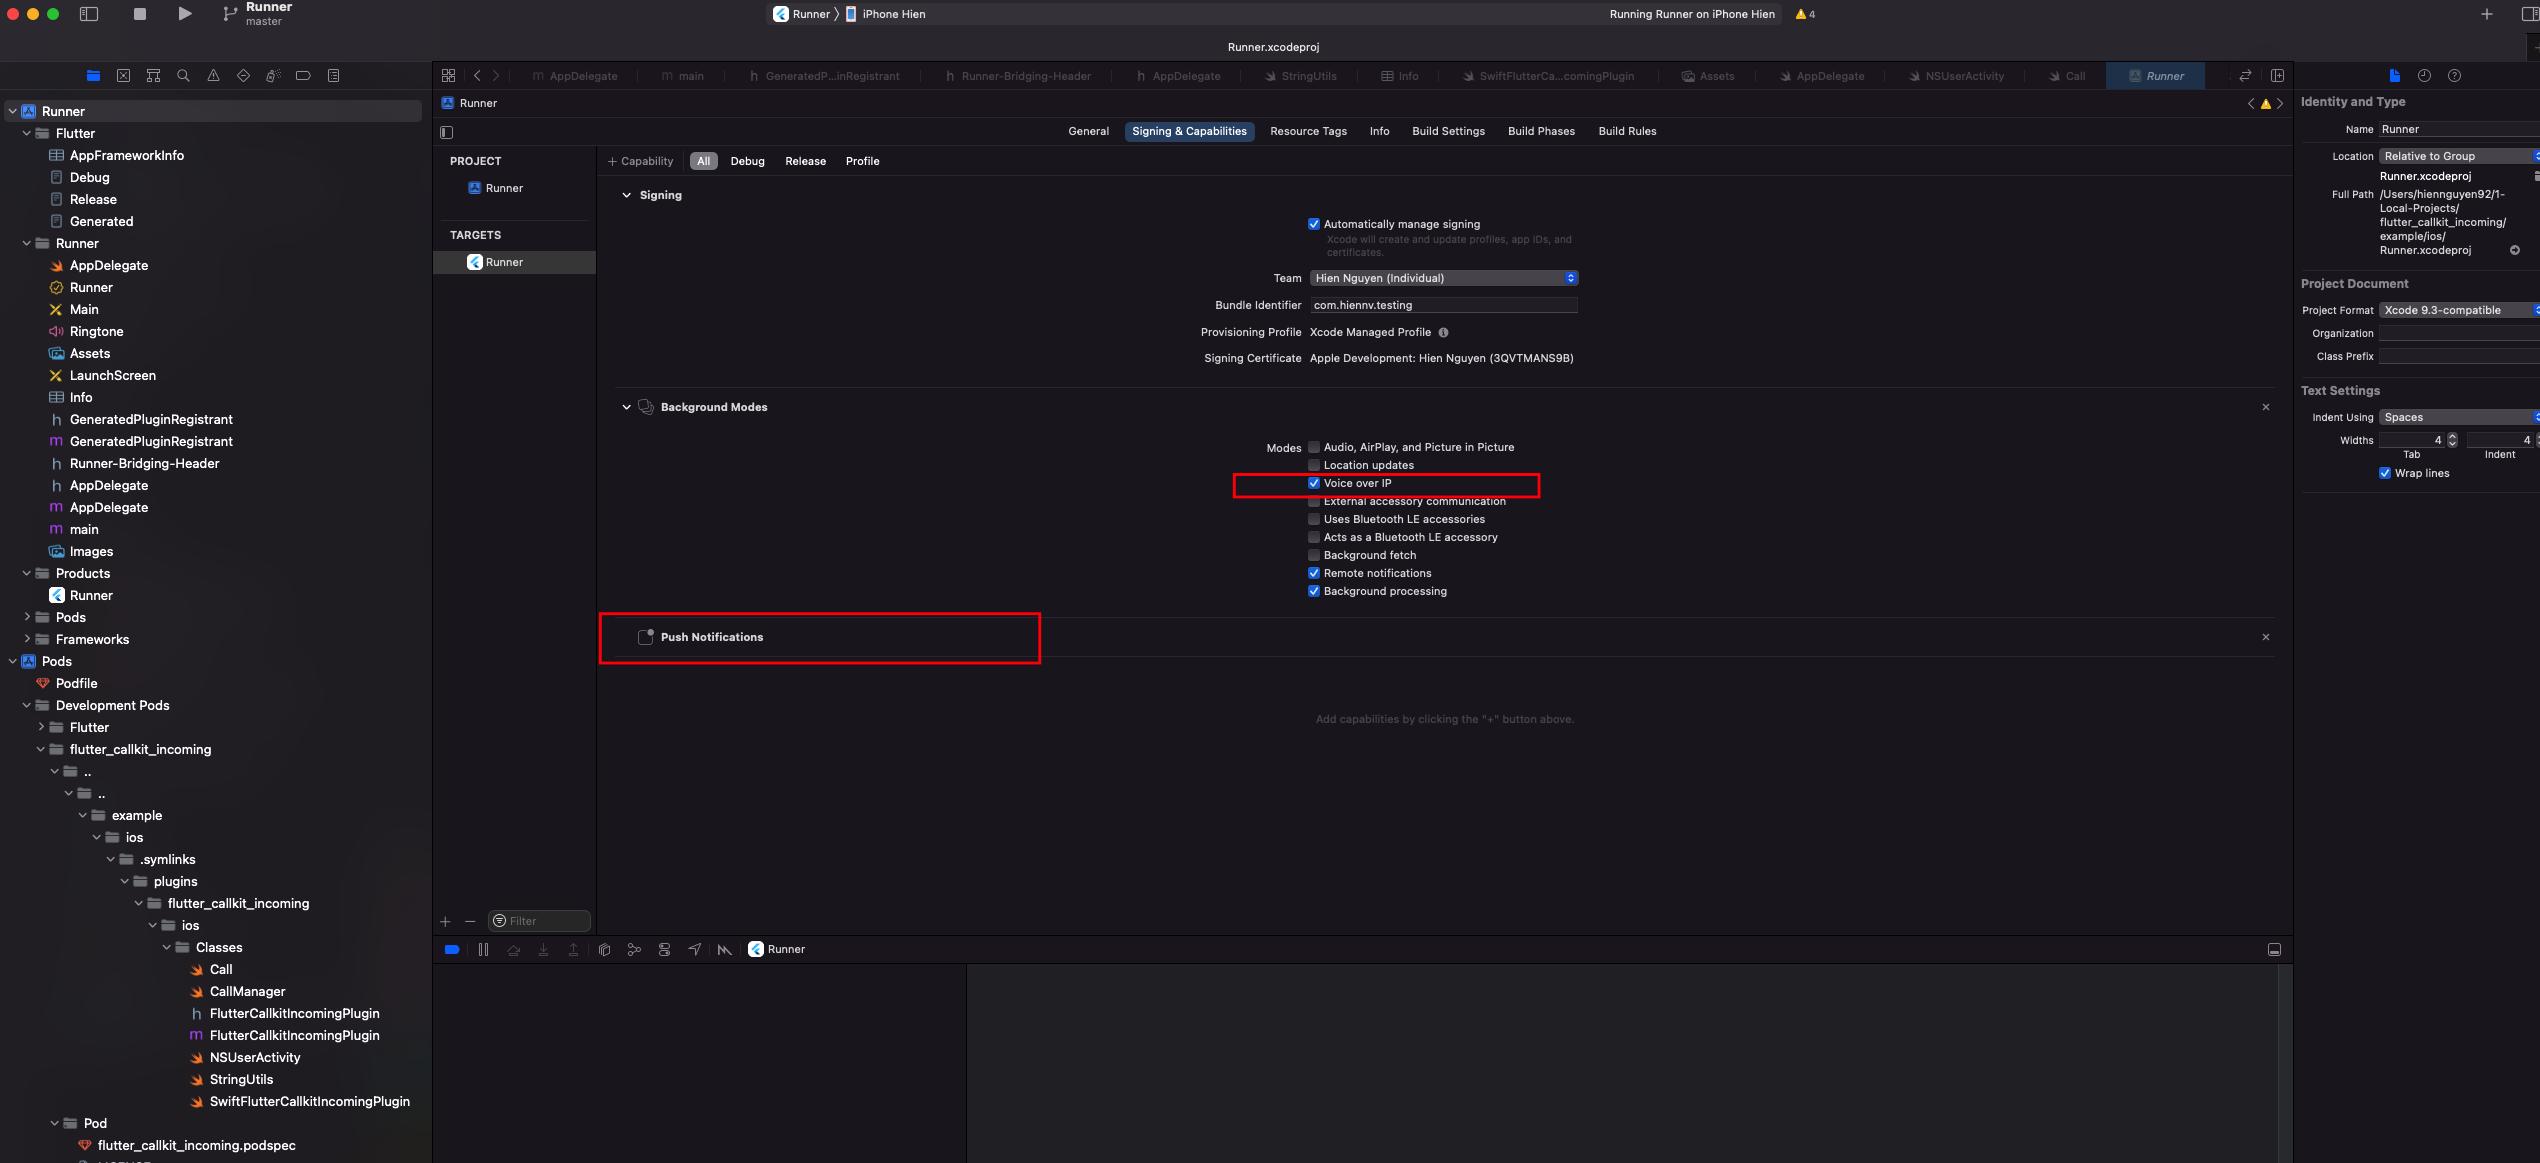
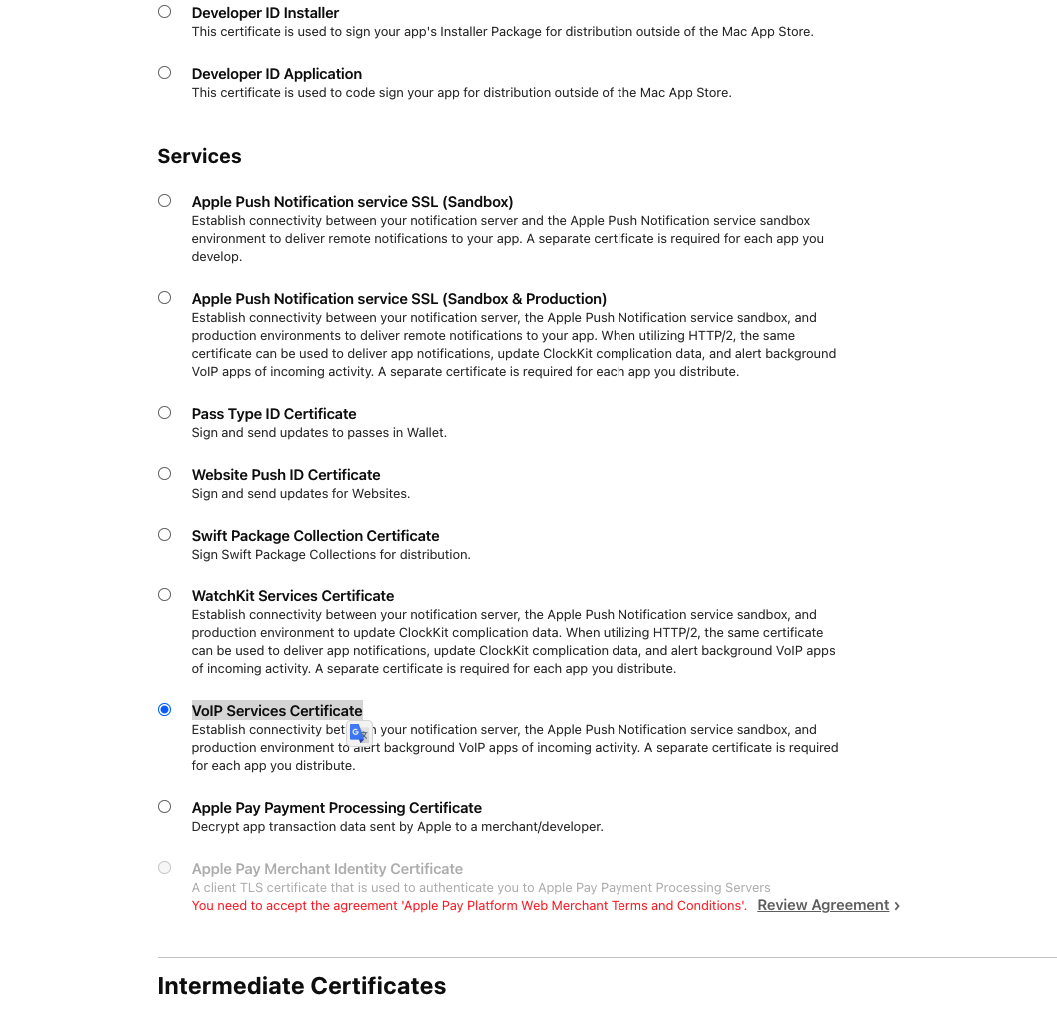
* VoIP Services Certificate
Go to https://developer.apple.com/account/resources/certificates/add
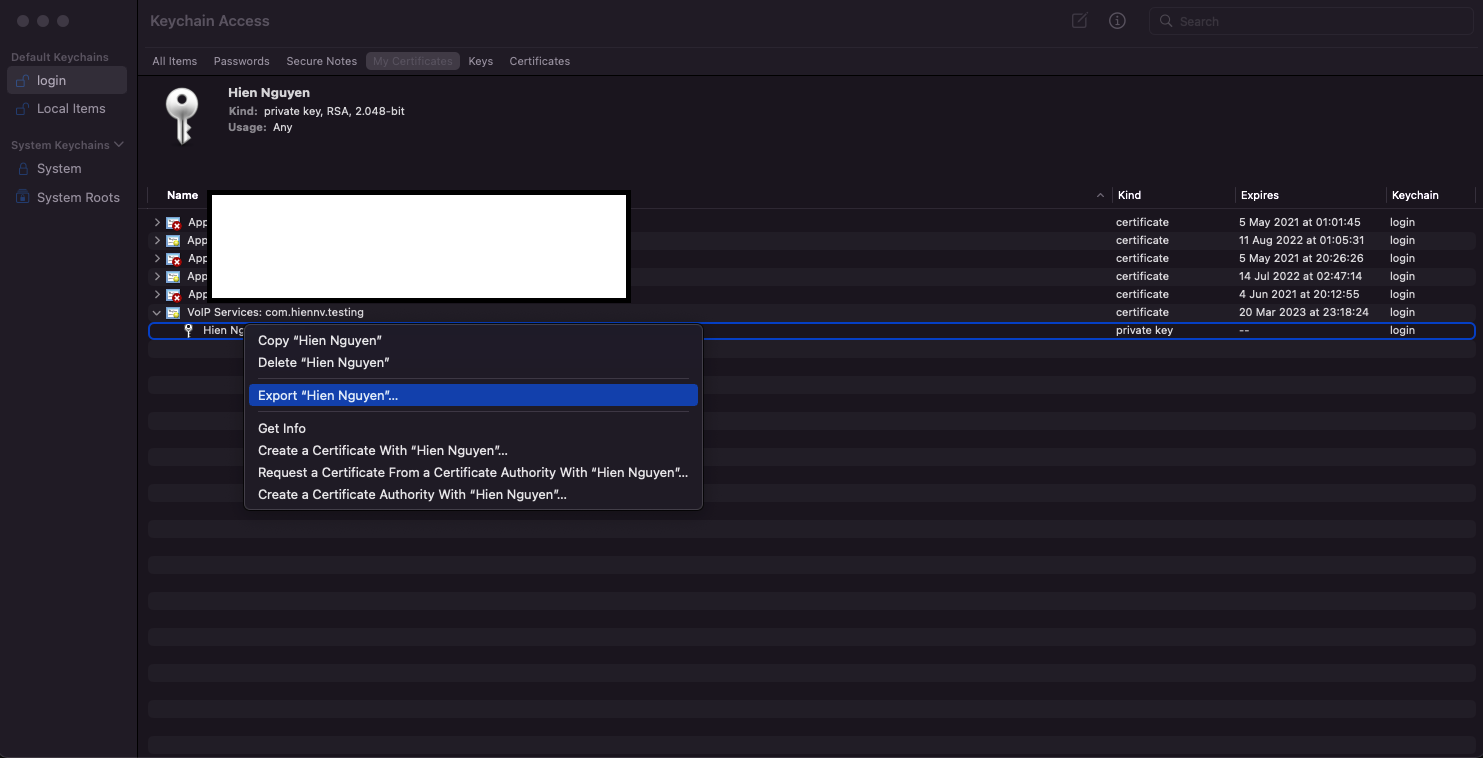
Download the certificate and install it into the Keychain Access app(download .cer and double click to install).
* Export .p12
* Convert .p12 to .pem (VOIP.pem)
```console
openssl pkcs12 -in YOUR_CERTIFICATES.p12 -out VOIP.pem -nodes -clcerts
```
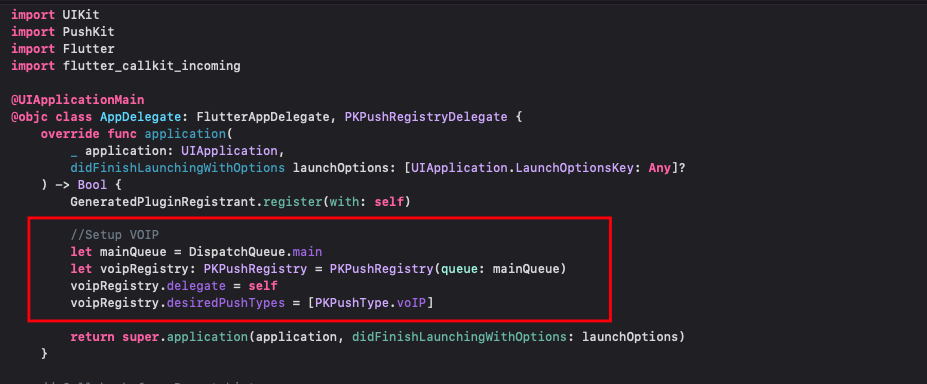
2. Configure VoIP Push Notifications in Xcode project (Swift)
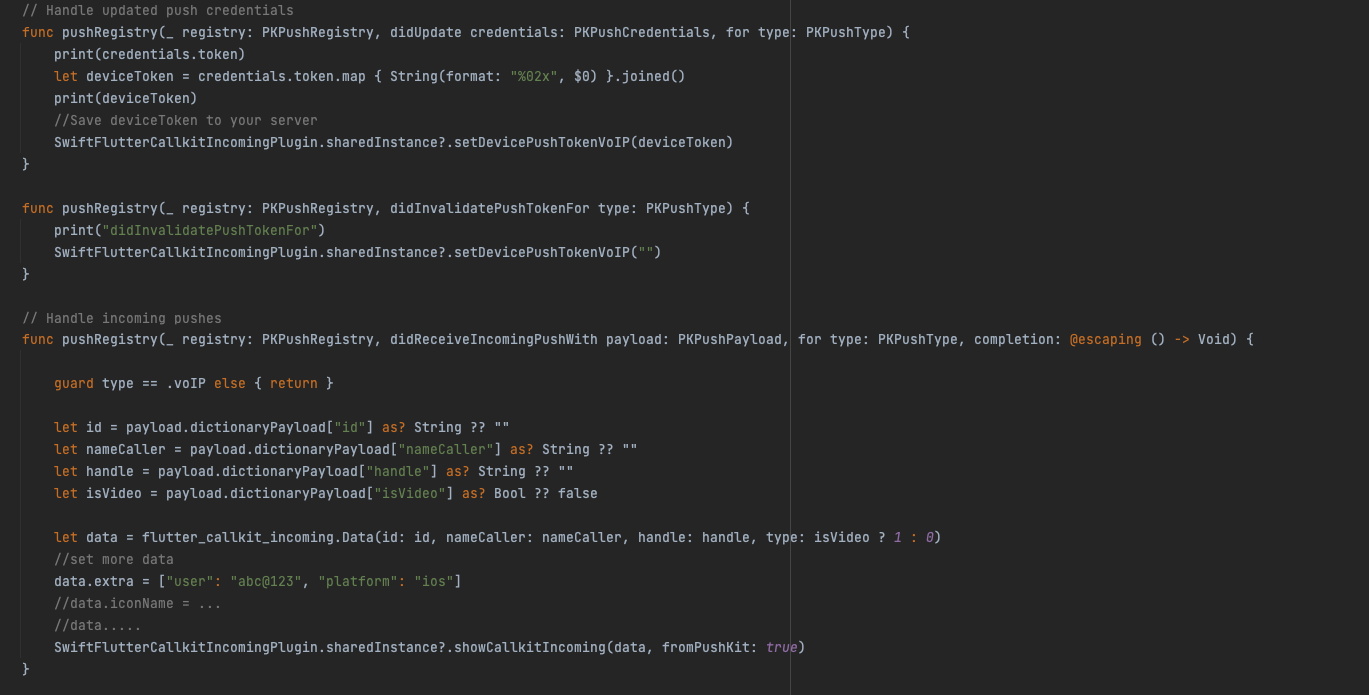
* Setup VoIP
* DeviceToken and handle incoming pushs
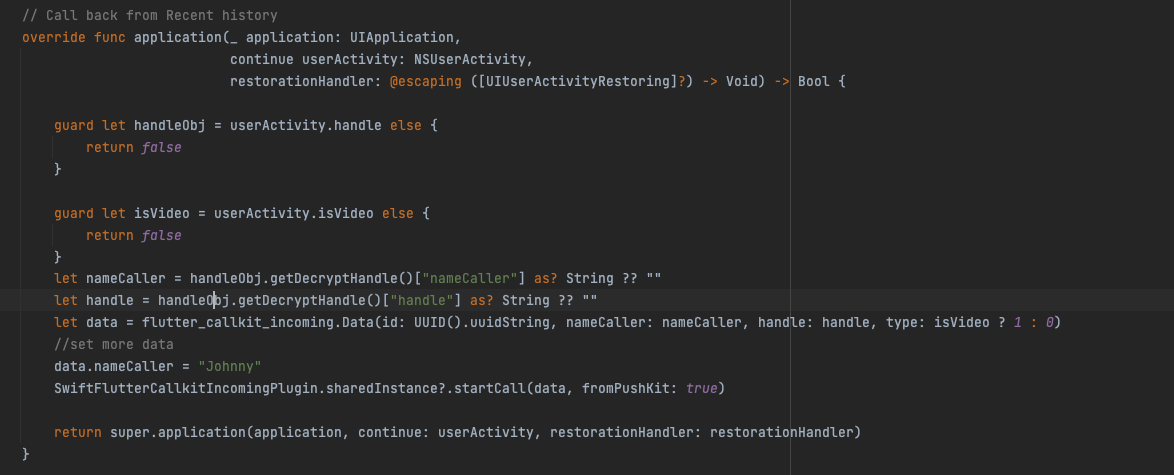
* Start call from Recent history on click (add if necessary)
* Example
https://github.com/hiennguyen92/flutter_callkit_incoming/blob/master/example/ios/Runner/AppDelegate.swift
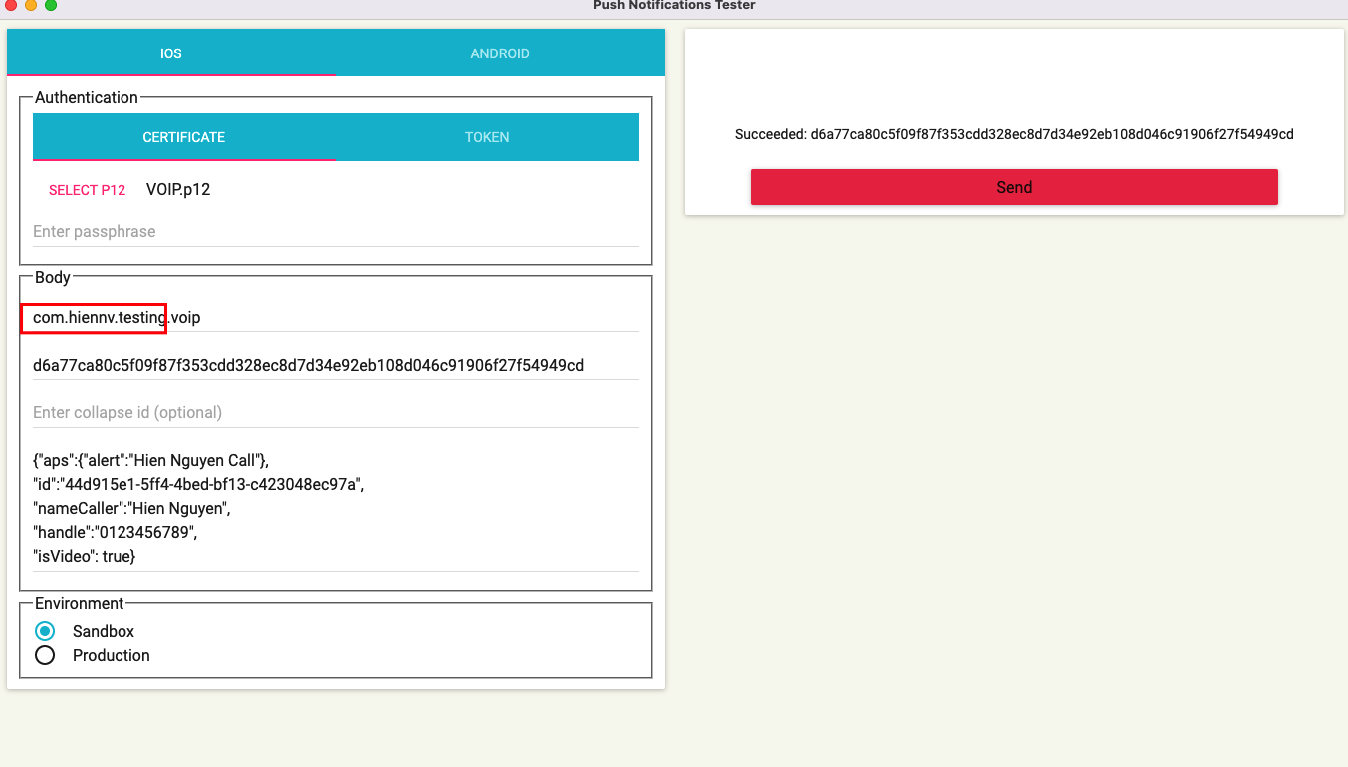
3. Testing
* Using App
https://github.com/onmyway133/PushNotifications
* Using Curl
```
curl -v \
-d '{"aps":{"alert":"Hien Nguyen Call"},"id":"44d915e1-5ff4-4bed-bf13-c423048ec97a","nameCaller":"Hien Nguyen","handle":"0123456789","isVideo":true}' \
-H "apns-topic: com.hiennv.testing.voip" \
-H "apns-push-type: voip" \
--http2 \
--cert VOIP.pem:'' \
https://api.development.push.apple.com/3/device/
```
* NOTE
To be able to testing in Terminated State
`Xcode -> Edit Schema -> Wait for the executable to be launched`